How to define viewpoint programmatically in Mayavi
Note: If you have trouble installing Mayavi, you can take a look at my post: How to install Mayavi.
Problem
Given the following Python code
import numpy as np
from mayavi import mlab

n = 8
t = np.linspace(-np.pi, np.pi, n)
z = np.exp(1j * t)
x = z.real.copy()
y = z.imag.copy()
z = np.zeros_like(x)

triangles = [(0, i, i + 1) for i in range(1, n)]
x = np.r_[0, x]
y = np.r_[0, y]
z = np.r_[1, z]
t = np.r_[0, t]


mlab.triangular_mesh(x, y, z, triangles, scalars=t)
mlab.show()
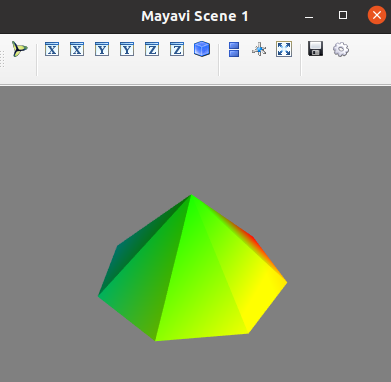
When we run it, Mayavi draws the shape using the default viewpoint

From the GUI, we can change easily the viewpoint by dragging the left mouse e.g. in the figure below

However, if we close the window and rerun the python code, Mayavi still usesthe default viewpoint. In this tutorial, I will show you how to obtain the code that draws the viewpoint you want and then how to put it in the python program.
Find the code that generate the viewpoint you want
- Click on the button highlighted in a red square below to open Mayavi piplepline window


- Click on the red circle to open. Note: The recording box must be checked.

- Click on the button highlighted in a red square below to view the object along the x axis

Result

- Then, dragging the left mouse to change to the viewpoint you want. For example:

- Note that on the Edit properties window, the code used to change to te corresponding viewpoint has been generated

Put the generated code into the Python program
- Use the following code to get the Mayavi scene object
figure = mlab.figure()
scene = figure.scene
- Replace all
scene.scenetoscene
scene.x_minus_view()
scene.camera.position = [-1.1437838116861252, -2.116527050821497, 5.572515456581492]
scene.camera.focal_point = [-0.04951556604879043, 0.0, 0.5]
scene.camera.view_angle = 30.0
scene.camera.view_up = [0.8794813509054432, 0.34100117306501826, 0.33201017059394156]
scene.camera.clipping_range = [3.545571276948115, 8.209200934599123]
scene.camera.compute_view_plane_normal()
scene.render()
- Put them together to the original Python program
import numpy as np
from mayavi import mlab

n = 8
t = np.linspace(-np.pi, np.pi, n)
z = np.exp(1j * t)
x = z.real.copy()
y = z.imag.copy()
z = np.zeros_like(x)

triangles = [(0, i, i + 1) for i in range(1, n)]
x = np.r_[0, x]
y = np.r_[0, y]
z = np.r_[1, z]
t = np.r_[0, t]

# ==== Code added for fixing the viewpoint ====
figure = mlab.figure()
scene = figure.scene
scene.x_minus_view()
scene.camera.position = [-1.1437838116861252, -2.116527050821497, 5.572515456581492]
scene.camera.focal_point = [-0.04951556604879043, 0.0, 0.5]
scene.camera.view_angle = 30.0
scene.camera.view_up = [0.8794813509054432, 0.34100117306501826, 0.33201017059394156]
scene.camera.clipping_range = [3.545571276948115, 8.209200934599123]
scene.camera.compute_view_plane_normal()
scene.render()
# ====================

mlab.triangular_mesh(x, y, z, triangles, scalars=t)
mlab.show()
- That’s it. Now everytime you run the Python program, Mayavi uses the defined viewpoint
